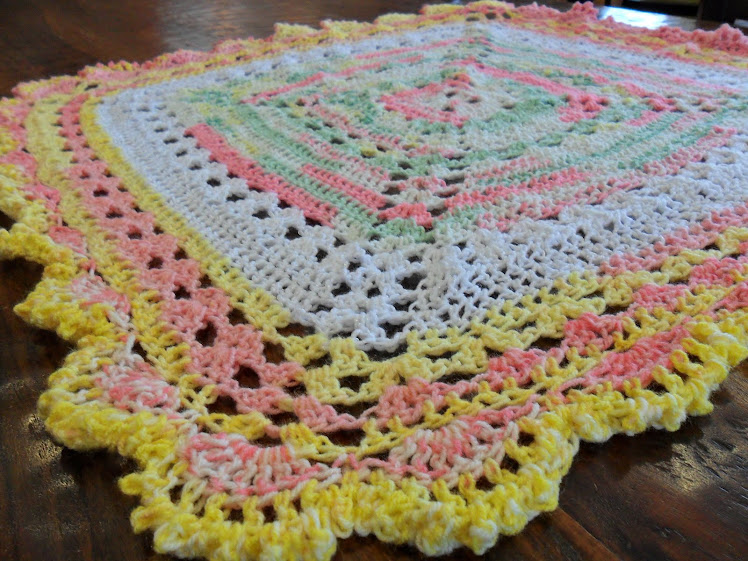
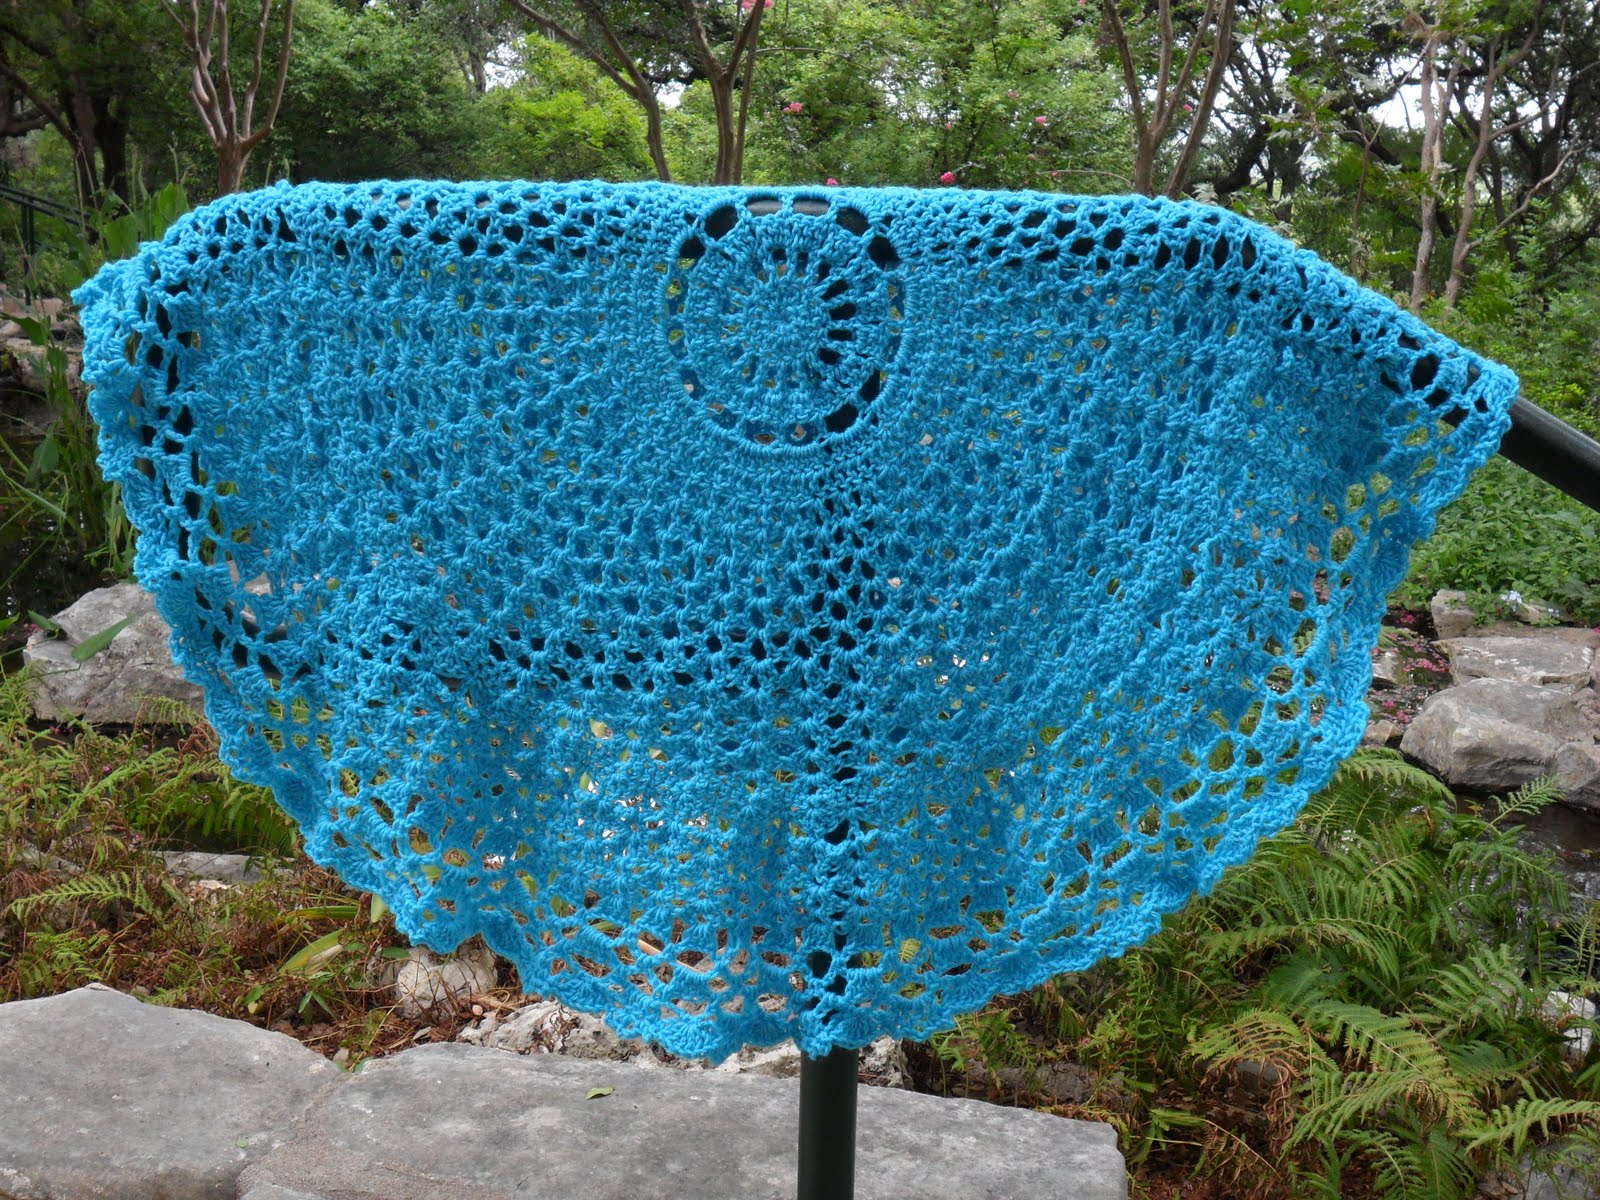
Welcome to Valis’ Circular Shawl Pattern
I decided not to do this pattern as a CAL. Too much to do. But, I do believe you will have fun with this project because of the basic stitches and instructions. I would love feedback on the comment section or you may join Valis Crochet View-A-Long group on
Ravelry and discuss any concerns or anything from this project.
Let’s get started!
The Size: 42’ diameter
The Gauge: Rounds 1-3 in dc=4 inch diameter (really, gauge is not critical)
The Materials:
- Lion brand Pound of Love 1020yds/932.7m or any medium worsted weight yarn
The Stitches:
Chain (ch)
Slip stitch (sl st)
Single crochet (sc)
Double crochet (dc)
V stitch (v st)
Double V stitch (dv st)
Shell stitch (5 or6 sh)
Camelot: from New Directions in Crochet by Anne Rabun Ough, the Viking Press-New York, 1981. Page 143.
The Instructions:
Round 1:
- Make a circle by slip stitch (sl st) of 3rd chain (ch) into the 1st ch as a join. (Makes a tiny circle)
- Ch 1 and insert the hook in the tiny hole and make a single crochet stitch (sc).
- Make 15 more sc in this circle.
- Sl st the 15th st into 1st ch 1.
Round 2:
- Ch 6 (Counts as 1 dc and ch 3.).
- *1 Double crochet (dc) into the next st, ch 3*.
- Repeat *from around into the next 14 sc.
- Sl st the 15th st into the 3rd ch of the beginning ch 6 st.
- Total : 16 dc and 16 ch 3.
Round 3:
- Sl st to the first ch, ch 3.
- Dc in the next 2 ch, ch 1, and skip the next dc st.
- *1 dc in the next 3 ch and ch 1, and skip the next dc*.
- Repeat * from around with a sl st to the top of ch 3.
- Total sts: 48 dc and 16 ch.
Round 4:
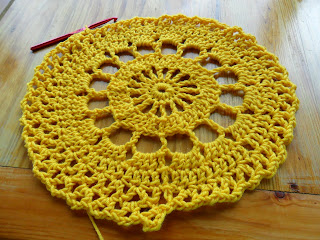 |
| Shawl in progress. |
- Ch 8 (Counts as 1 dc and ch 5.).
- Skip the next 2 dc.
- 1 dc in the ch 1 space (sp).and ch 5.
- *Skip the next 3 dc, 1 dc in the ch 1 sp, ch 5*.
- Repeat * from around.
- Sl st to the 3rd ch.
- Total: 16 dc and 16 ch 5 sp.
Round 5:
- Sl st into the ch 5 sp and ch 3. 4 dc in the ch 5 sp. Ch 1 and skip the next dc.
- *5 dc in the next ch 5 sp. Ch 1 and skip the next dc*.
- Repeat * from around.
- Sl st into the top of ch 3.
- Total: 80 dc and 16 ch 1.
Round 6:
- Ch 3 and dc in the next 4 dc, skip the next ch 1.
- *Dc in the next 5 dc and skip the next ch 1*
- Repeat * from around.
- Sl st to the top of the ch 3.
- Total: 80 dcs.
Round 7:
- Ch 5 (Counts as 1 dc and ch 2). 1 dc in the same sp.
- Skip the next dc and work v-stitch (v st): [1 dc, ch 2, 1 dc] in the next dc.
- *Skip next dc, work v st [1 dc, ch 2, 1 dc] in the next dc*.
- Repeat * from around.
- Sl st to the top of ch 3.
- Total: 40 v sts.
Round 8:
- Sl st into previous row v st space (sp).
- Ch 5 (Counts as a 1 dc and ch 2) in the v st sp. 1 dc in that same sp.
- Work v st (1 dc, ch 2, 1 dc) in the next v st sp.
- Continue *v st (1 dc, ch 2, 1 dc) in the next v st sp*.
- Repeat * from around.
- Sl st into the top of ch 3.
- Total: 40 v sts.
Round 9:
- Sl st into the next v st sp.
- Ch 6 (Counts as a 1 dc, ch 3), 1 dc in that same v st sp.
- Work *v st (1 dc, ch 3, 1 dc) into the next v st sp*.
- Repeat * from around.
- Sl st into the top of ch 3.
- Total: 40 v sts.
Round 10-12
- Repeat Row 9 for the next 3 rounds.
- Total: 40 v sts.
Round 13
- Sl st into the next v st sp.
- Ch 3 (Counts as 1 dc), 1 dc, ch 3, 2 dc in the same v st sp. Double v st made. (dv st)
- Work *dv st (2 dc, ch 3, 2 dc) into the next v st sp*.
- Repeat * from around.
- Sl st into the top of ch 3.
- Total: 40 dv sts.
Rounds 14-17
- Repeat Round 13 for the next 4 rounds.
- Total: 40 dv sts.
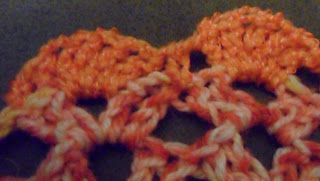 |
| Row 18 set up to use as a guide. |
Round 18
- Ch 2 (Counts as 1 sc, ch 1)
- Skip the next dc, 5 dc (shell made) in the ch 3 sp of the dv st.
- Skip the next dc, 1 sc in the next dc, ch 1.
- Work *skip the next dc, 5 dc (shell) in the dv st sp, skip the next dc, 1 sc in the next dc, ch 1*.
- Repeat * from around.
- Sl st into the top of ch 1.
- Total: 40/5 dc shells (sh), 40 sc.
Round 19:
- Ch 8 (Counts as 1 dc, ch 5).
- Skip 2 dc, 1 sc in the next dc (Which is in the middle of the 5 dc sh.), ch 5, 1 dc in the next sc. Ch 5, skip next 2 dc, 1 dc in the next sc.
- Work *ch 5, skip next 2 dc, 1 sc in the next dc. Ch 5, skip the next 2 dc, 1 dc in the next sc.*
- Repeat * from around.
- Sl st into the top of ch 3.
- Total: 40 sc, 40 dc, 80 ch 5.
Round 20:
- Ch 4 (Counts as 1 dc and ch 1), ch 1, skip ch 5, dv st (2 dc, ch 2, 2 dc) in the next sc,skip ch 5, v st (1 dc, ch 2, 1 dc) on top of the 1 dc.
- Work *skip ch 5, dv st (2 dc, ch 2, 2 dc) in the next sc. Skip ch 5, V st (1 dc, ch 1, 1 dc) on top of dc.*
- Repeat * from around.
- Sl st into the top of ch 3.
- Total : 40 v st, 40 dv st.
Round 21:
- Sl st into the v st sp.
- Ch 3 (Counts as 1 dc), 1 dc, ch 2, 2 dc in that same v st sp. (dv st made)
- V st (1 dc, ch 2, 1 dc) in the next dv st sp.
- Work * dv st (2 dc, ch 2, 2 dc) in the next v st sp. V st (1 dc, ch 2, 1 dc) in the next dv st sp.*
- Repeat * from around.
- Sl st into the top of ch 3.
- Total: 40 v st, 40 dv st.
Do you see the alternating rows of v st and dv st?
Round 22:
Round 23:
Round 24:
- This time: Turn, and sl st into the v st sp.
- Ch 3 (Counts as 1 dc.) 3 dc in the same v st sp. Ch 3.
- Work *4 dc in the next dv st sp, ch 3 and 4 dc, ch 3 in the next v st sp*.
- Repeat * from around.
- Sl st into the top of ch 3.
- Total: 80 /4dc, 80 ch 3.
Round 25:
Starting the Camelot foundation.
- Turn. Sl st into the ch 3 sp and ch 1 (Counts as 1 sc.). Ch 6.
- Work * 1 sc in the ch 3 sp, ch 6.*
- Repeat * from around.
- Sl st into the top of ch 1.
- Total: 80 sc, 80/ch 6.
Round 26:
- Turn.
- Ch 1 ( Counts as 1 sc.) and sl st into the next ch 3. Ch 3 (Counts as 1 dc.), 3 dc in that same ch 6 sp. Ch 3, sc in the next ch 6 sp and ch 3.
- Work * 4 dc in the next ch 6 sp, ch 3, 1 sc in the next ch 6 sp. *
- Repeat * from around.
- Sl st into the top of ch 3 as the 4th dc of the last st of this round.
- Total: 40 sc, 40/4 dc, 80 ch 3.
Round 27:
- Repeat Round 25 but Do Not Turn!
Now, you can either continue Rounds 25 and 26 or complete Round 28 as the edging. From Round 1 to Round 28, the diameter is at 42”. It depends on the desired diameter as a shawl, blanket, or afghan.
The Edging
Round 28:
- Turn. Ch 3 and 1 sc in the next 3 dc. 6 dc (shell made) in the next sc.
- Work *ch 3 and 1 sc in the next 3 dc. 6 dc (shell made) in the next sc.*
- Repeat * from around.
- Total: 40 shells, and 40/3 sc.
This shape and the design of the shawl were inspired by a mathematician and by the botanical gardens in Austin, Texas.
After being here for almost a year, I have recovered from many stressful events. This city is wonderful for healing, making new friends, and creating beautiful fabric.
I want to share this pattern with you and ask only one thing in return. I ask that you make one for charity or give as a gift.
Happy Crocheting! Valis’
Copyright 2010. http://www.valiscrochetmoment.blogspot.com